Setting Up a Custom Domain for Cloud Run
After deploying my website to Cloud Run, I pointed my custom domain to it using Cloud Run's domain mapping feature. Cloud Run automatically provisions SSL certificates and routes traffic through Google's global load balancers. This post covers domain verification, DNS configuration, and certificate provisioning.
What I Started With
Before I jumped into this, I already had:
- A Cloud Run service already deployed (see my previous post on deployment)
- A domain registered with Namecheap
- gcloud CLI installed and authenticated
- Control over my domain's DNS settings
First Step: Enable Required APIs
I started by enabling a couple of Google Cloud APIs. Without these APIs, SSL certificate provisioning fails silently and you'll be stuck wondering why:
gcloud services enable compute.googleapis.com \
  certificatemanager.googleapis.com \
  --project your-project-id
The Compute Engine API is needed for the load balancer to perform SSL termination, and the Certificate Manager API handles the certificate provisioning process. Missing these was the most common gotcha I ran into when my certificates got stuck in "pending" status.
Verifying Domain Ownership
Before Google Cloud would let me map my custom domain to Cloud Run, I had to prove I actually owned it. Otherwise anyone could hijack traffic by mapping someone else's domain to their service.
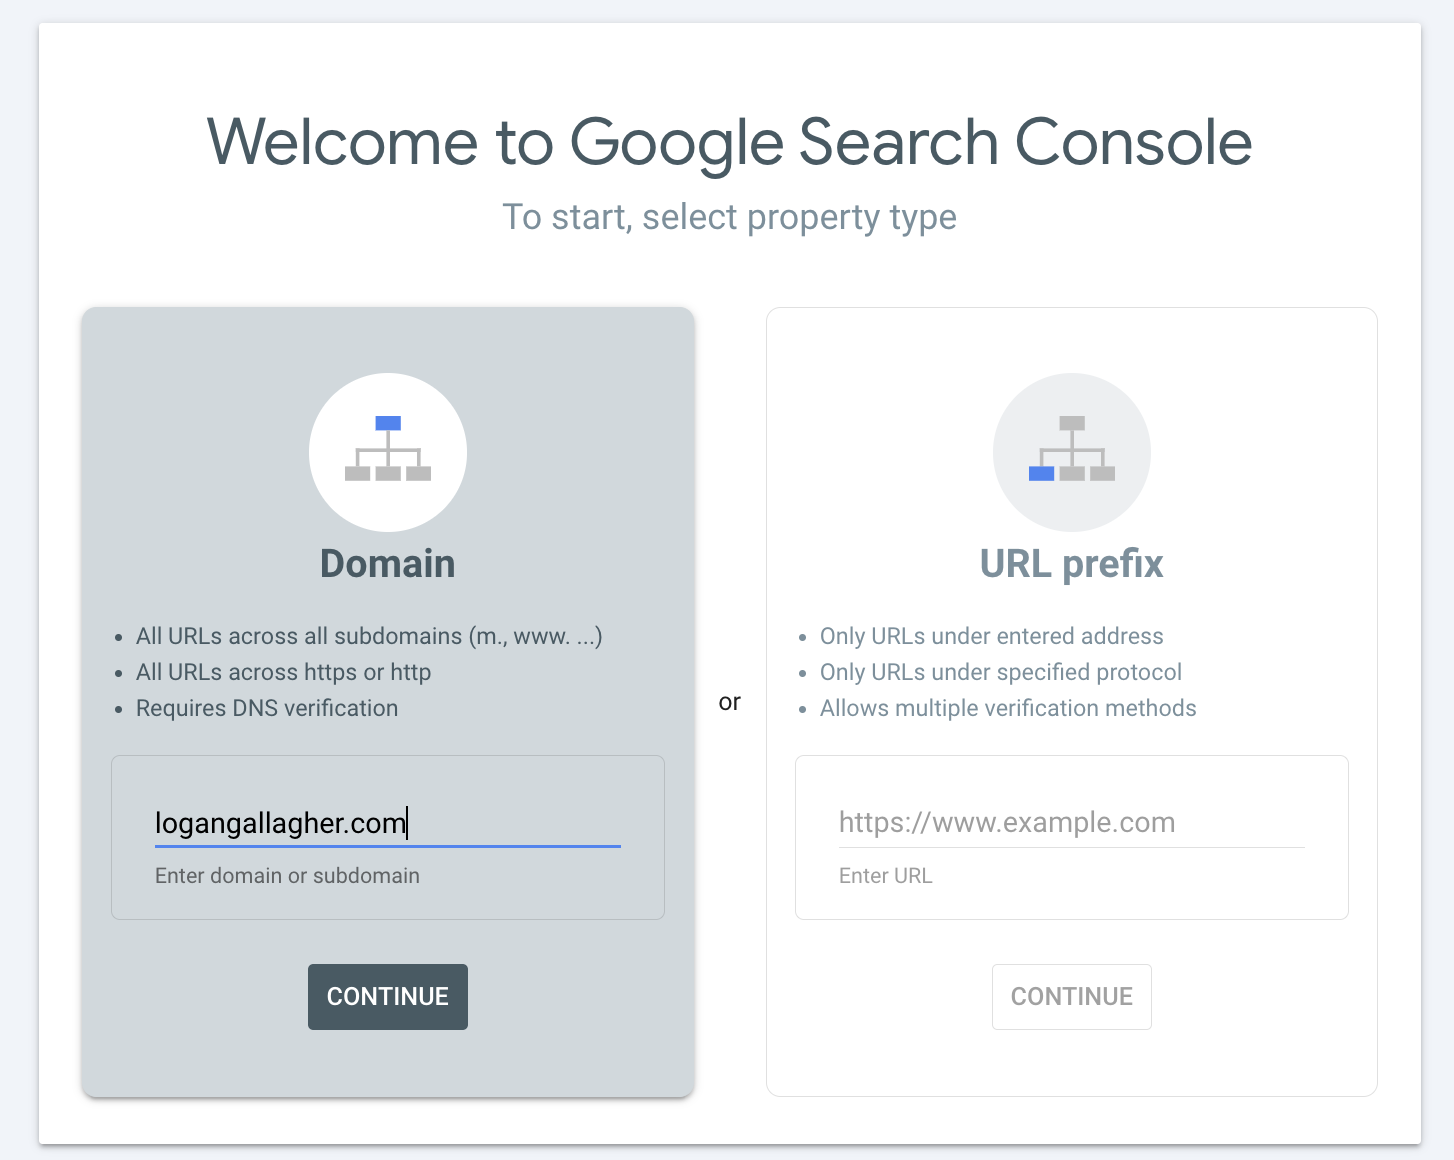
Using Google Search Console
I used Google Search Console for verification since it was the easiest method:
- I went to Google Search Console
- Selected Domain as the property type (not URL prefix)
- Entered my domain (
logangallagher.com) - Google provided a TXT record for verification
After entering my domain and clicking Continue, Google provided me with a TXT record:
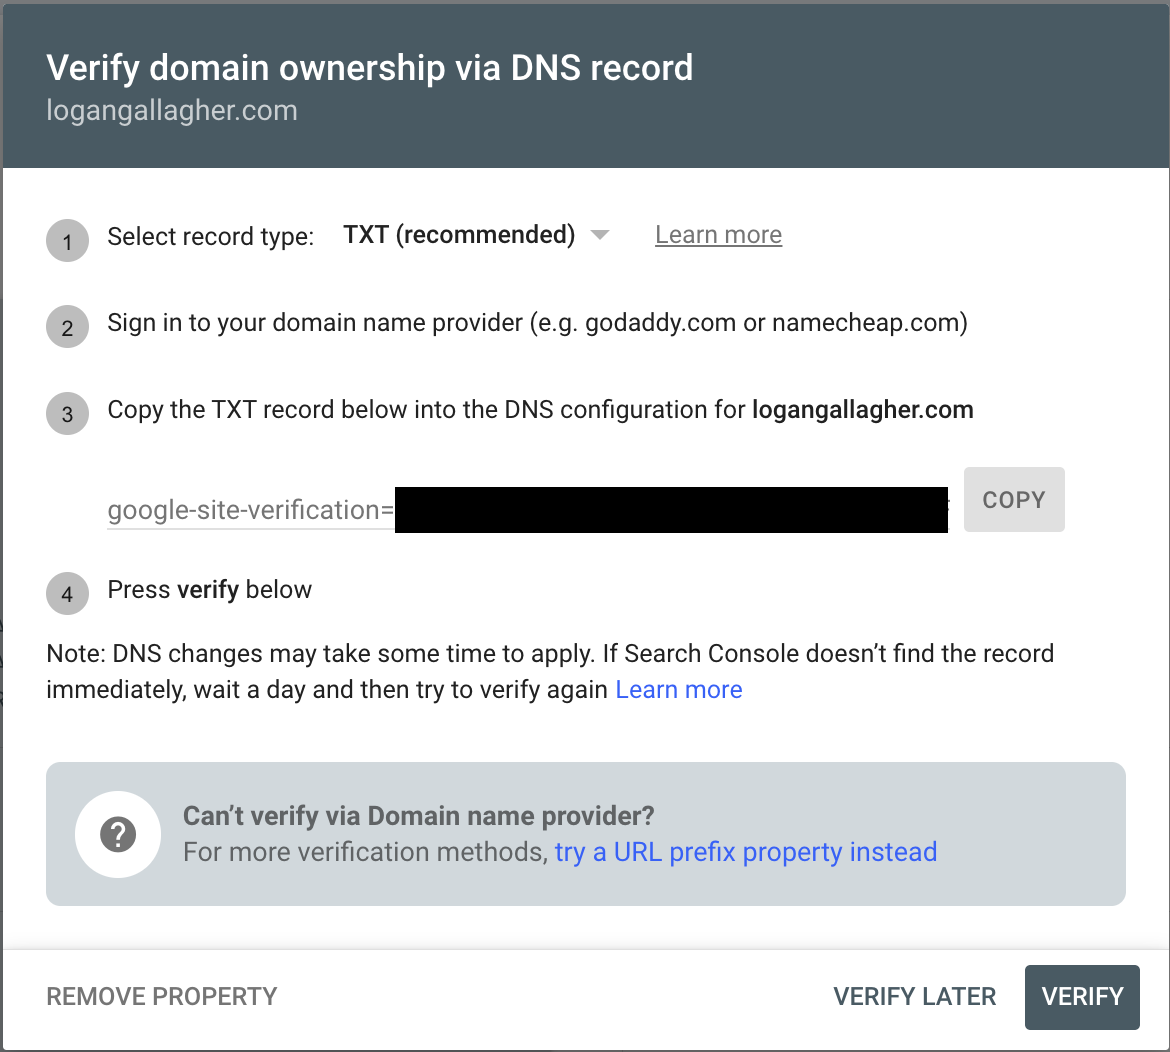
Adding the Verification Record
I added the TXT record to my DNS provider (Namecheap):
Type: TXT
Host: @
Value: google-site-verification=abc123xyz...
TTL: Automatic (or 1 minute for faster propagation)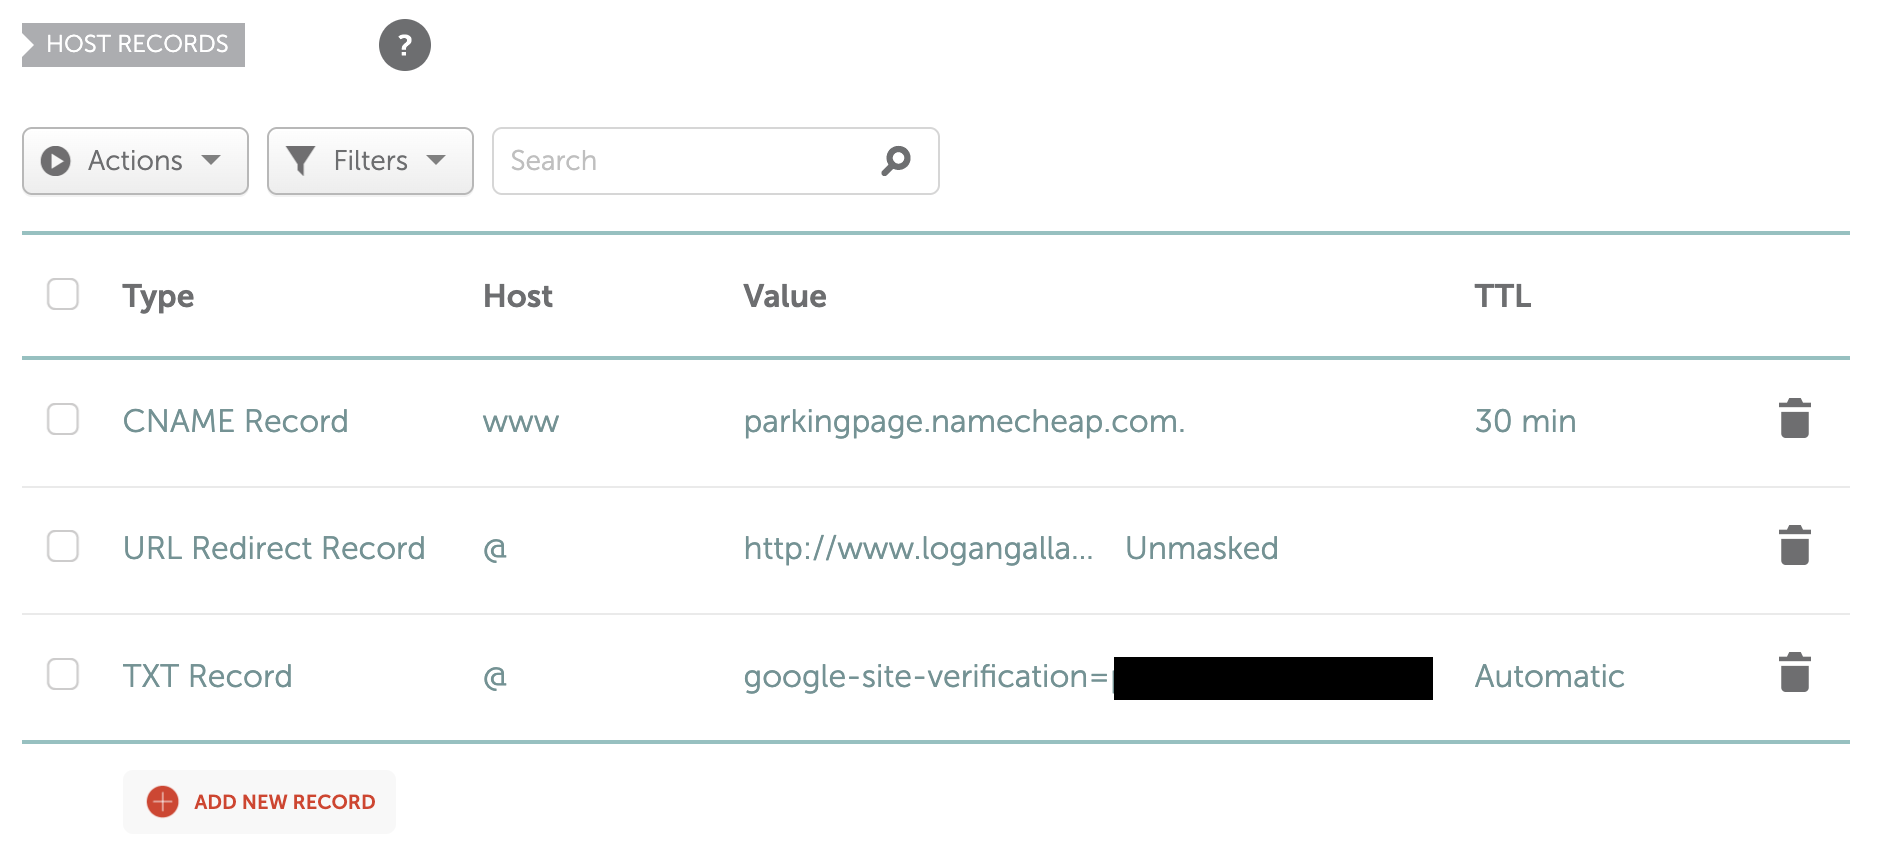
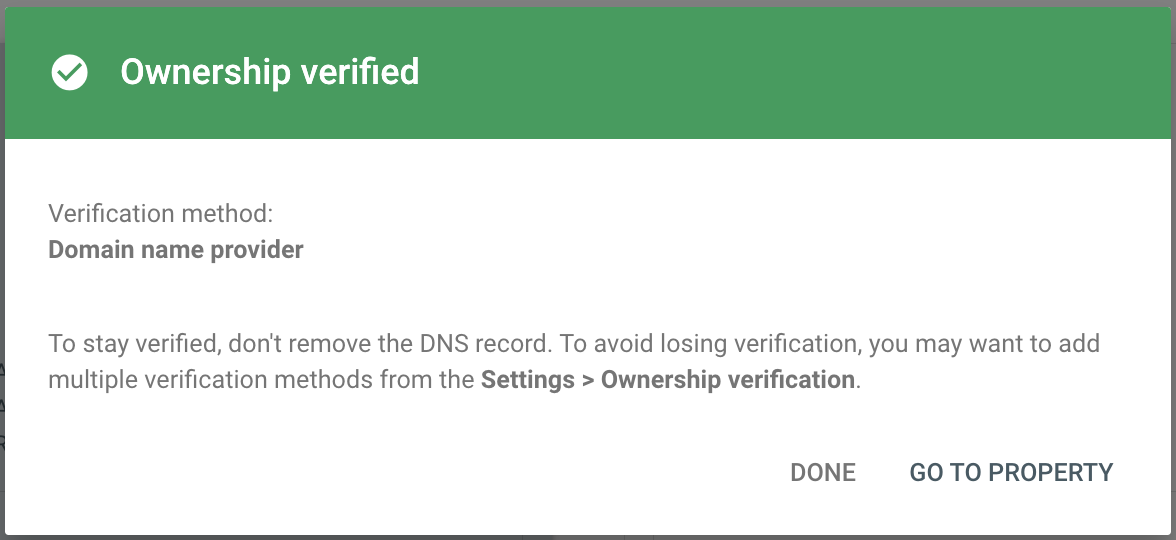
After adding the record, I clicked Verify in Search Console. DNS propagation usually takes a few minutes but can take up to 48 hours. Mine went through pretty quickly.
Note: If your DNS is managed by another hosting provider (not your domain registrar), you'll need to add the record there instead. I switched to my registrar's DNS for simpler management since I wasn't using other hosting services.
Creating the Domain Mapping
Once my domain was verified, I could map it to my Cloud Run service. This tells Google Cloud to route traffic from my domain to the service.
Install gcloud Beta Components
I needed the beta command group for domain mapping:
gcloud components install beta --quietCreate the Mapping
gcloud beta run domain-mappings create \
  --service personal-website \
  --domain logangallagher.com \
  --region us-west1 \
  --project your-project-id
This command outputted the DNS records I needed to add to my domain registrar. I got 4 A records and 4 AAAA records (IPv6).
Configuring DNS Records
The domain mapping command gave me specific IP addresses to point my domain to. These are Google's global load balancers that route traffic to the Cloud Run service.
A Records (IPv4)
I added these four A records to my DNS:
Type: A | Host: @ | Value: 216.239.32.21
Type: A | Host: @ | Value: 216.239.34.21
Type: A | Host: @ | Value: 216.239.36.21
Type: A | Host: @ | Value: 216.239.38.21
AAAA Records (IPv6)
Then I added these four AAAA records:
Type: AAAA | Host: @ | Value: 2001:4860:4802:32::15
Type: AAAA | Host: @ | Value: 2001:4860:4802:34::15
Type: AAAA | Host: @ | Value: 2001:4860:4802:36::15
Type: AAAA | Host: @ | Value: 2001:4860:4802:38::15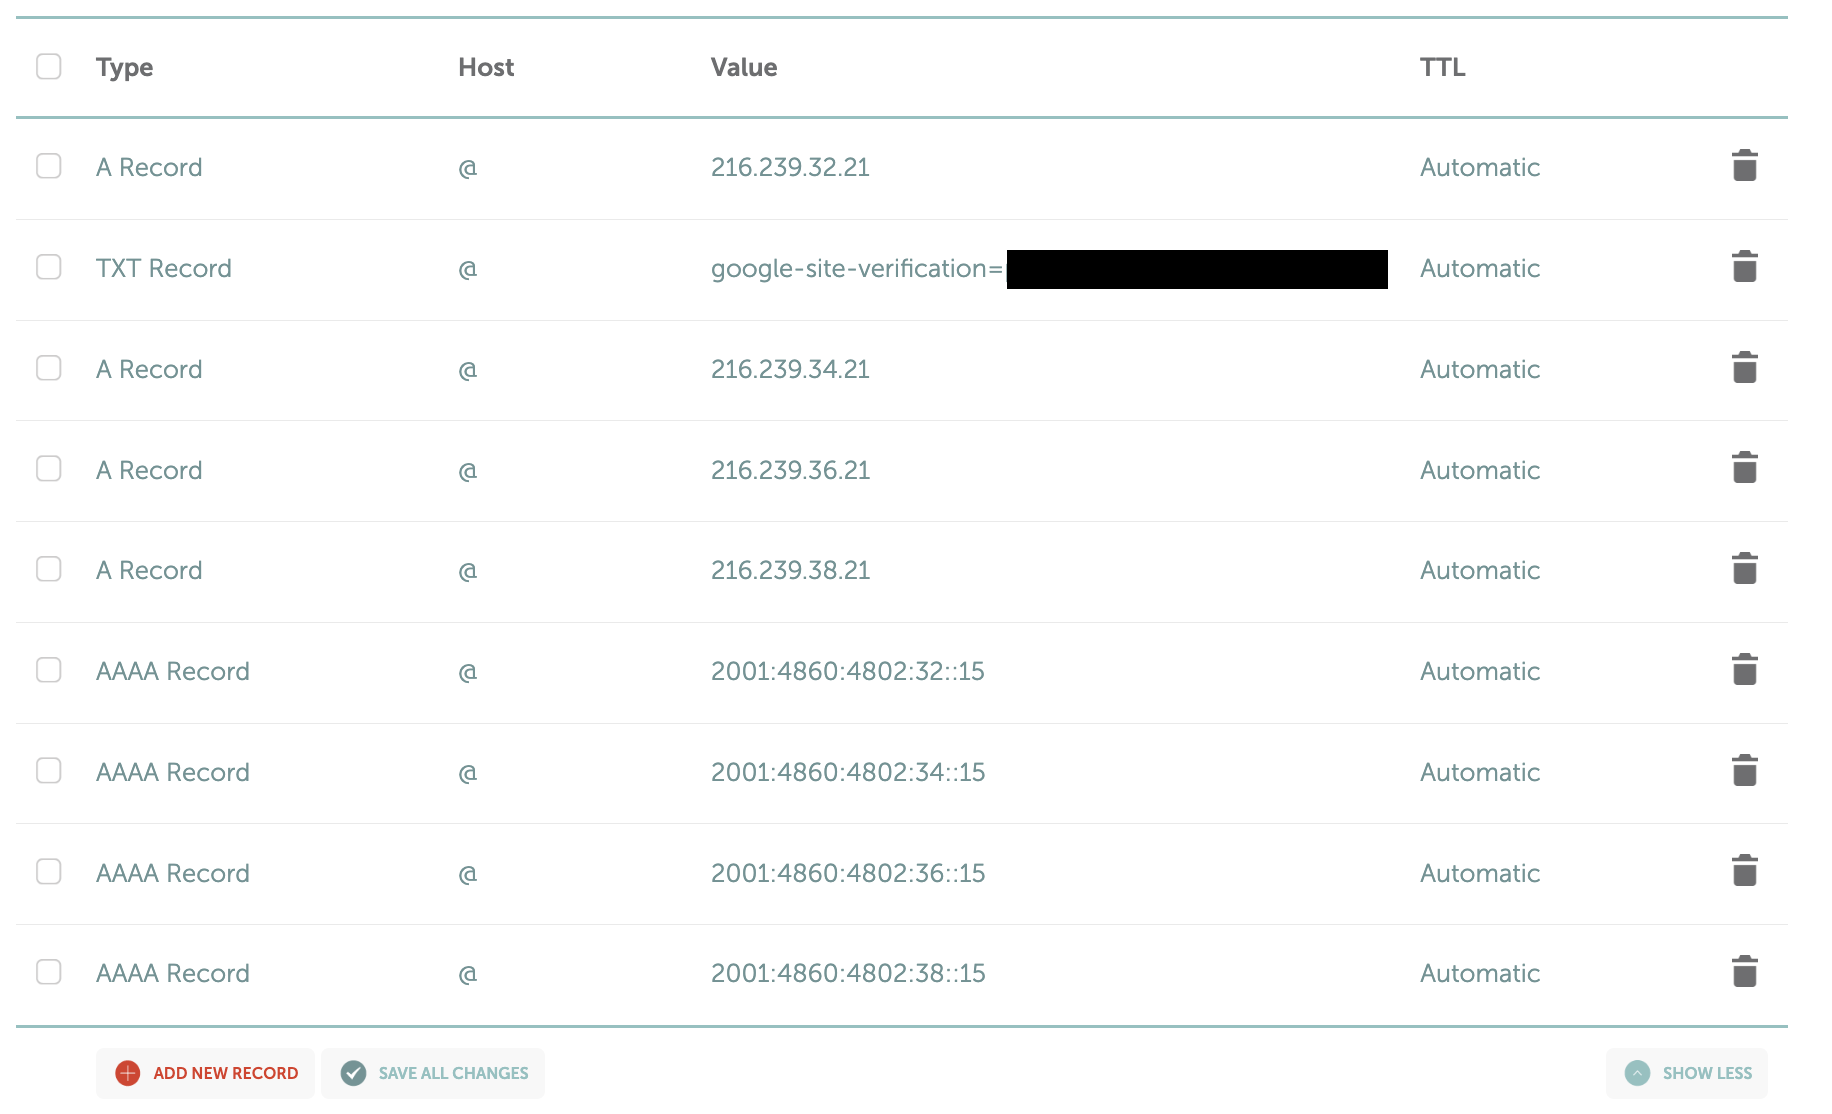
Important: I used @ for the Host field, which represents the root domain. I also deleted any existing A or AAAA records that pointed to other IPs to avoid conflicts.
Verifying DNS Propagation
After adding the DNS records, I verified they were propagating correctly using the dig command:
dig +short logangallagher.com AI should see all four IP addresses returned. If they don't show up immediately, wait a few minutes and try again.
SSL Certificate Provisioning
Once DNS was configured, Google Cloud automatically provisioned a free SSL certificate using Google-managed certificates (similar to Let's Encrypt). This process was completely automatic but took about 15 minutes.
Checking Certificate Status
gcloud beta run domain-mappings describe \
  --domain logangallagher.com \
  --region us-west1 \
  --project your-project-id
I looked for the CertificateProvisioned status in the output:
status:
  conditions:
  - type: CertificateProvisioned
    status: True  # Certificate is ready
    # or
    status: Unknown  # Still provisioning
What Happens During Provisioning
- Google verifies the DNS records point to their load balancers
- A certificate is requested from Google's certificate authority
- The certificate is validated and provisioned
- HTTPS becomes available for the domain
During this time, HTTP (port 80) worked and redirected to HTTPS, but the HTTPS connection didn't succeed until the certificate was ready.
Verifying the Setup
Once the certificate was provisioned, I tested my domain:
# Test HTTP (should redirect to HTTPS)
curl -I http://logangallagher.com

# Test HTTPS (should return 200 OK)
curl -I https://logangallagher.com
Issues I Ran Into
"The provided domain does not appear to be verified"
I hit this when I tried to create the domain mapping before completing verification. The fix was to complete domain verification through Google Search Console first. I checked my verified domains with:
gcloud domains list-user-verified --project your-project-idWhen verification failed, I saw an error message like this:

This typically means the TXT record hasn't propagated yet. I waited a few hours and tried again, and also double-checked that I'd added the record to the correct DNS provider (my registrar, not a hosting provider).
DNS Not Managed by Registrar
I initially had my DNS managed by a hosting provider (cPanel) rather than my registrar (Namecheap). I either needed to add the records there or switch DNS management back to my registrar (usually called "BasicDNS" or similar). I switched to my registrar's DNS for simpler management.
Certificate Stuck in "Pending"
The certificate status may show "Unknown" with a message like "Certificate issuance pending. The challenge data was not visible through the public internet." This is usually caused by missing API enablement (Solution 1), but if that doesn't resolve it, work through the following troubleshooting steps.
Solution 1 - Enable Required APIs: Missing API enablement is the most common cause. Enable both required APIs:
# Enable the required APIs
gcloud services enable compute.googleapis.com \
  certificatemanager.googleapis.com \
  --project your-project-id

# Wait 15-20 minutes for the next retry cycle
# Google retries certificate provisioning every ~15 minutes
Solution 2 - Verify DNS: Confirm DNS records are correct using dig:
dig +short your-domain.com A
dig +short your-domain.com AAAA
All 4 A records and 4 AAAA records should be returned. If not, wait for DNS propagation.
Solution 3 - Recreate Mapping: If the certificate is still stuck after enabling APIs and waiting 30+ minutes, delete and recreate the domain mapping:
# Delete the mapping
gcloud beta run domain-mappings delete \
  --domain your-domain.com \
  --region us-west1 \
  --project your-project-id

# Recreate it (this triggers a fresh certificate request)
gcloud beta run domain-mappings create \
  --service personal-website \
  --domain your-domain.com \
  --region us-west1 \
  --project your-project-id
Optional: Setting Up www Subdomain
I also wanted to support both the root domain and the www subdomain. To add www support, I created another domain mapping:
gcloud beta run domain-mappings create \
  --service personal-website \
  --domain www.logangallagher.com \
  --region us-west1 \
  --project your-project-id
Unlike the root domain which uses A and AAAA records, the www subdomain uses a CNAME record:
Type: CNAME
Host: www
Value: ghs.googlehosted.com.
TTL: Automatic
I added this single CNAME record to my DNS provider. The SSL certificate was automatically provisioned for the www subdomain just like the root domain (took about 15 minutes). Once complete, both logangallagher.com and www.logangallagher.com worked with HTTPS.
How It All Works
Here's what happens when someone visits my custom domain:
- DNS Resolution: My domain's A/AAAA records point to Google's global load balancers
- Load Balancer: Routes traffic to my Cloud Run service based on the domain mapping
- Cloud Run: Serves the containerized application
- SSL/TLS: Google-managed certificates handle HTTPS encryption automatically
What I Like About This Setup
- Free SSL certificates - Automatically provisioned and renewed
- Global load balancing - Traffic routed to the nearest Google edge location
- Automatic HTTPS redirect - HTTP traffic redirects to HTTPS by default
- No server management - Everything is managed by Google Cloud
- Persistent across deployments - Domain mapping survives service updates
Final Thoughts
Setting up a custom domain for Cloud Run is straightforward: verify domain ownership through Search Console, configure DNS records, and let Google provision SSL certificates automatically. After the initial setup, the domain mapping persists across deployments—no additional configuration needed.
After the initial setup, my domain mapping persists across all future deployments. I can continue deploying my service through GitHub Actions and my custom domain just keeps working without any additional configuration.